As
regards Canon's Digital Professional software, if you have
a Canon camera that will take RAW images, then packaged
with
the camera should be a CD-Rom including the DPS software.
After downloading it onto your computer, you will be able to edit the
RAW images you've taken, and also convert
them to .jpg format
(which involves some compression and
permanent slight loss in
quality of the image).
Over
the years, I have lobbed numerous jpg photos, which I've
over-exposed. If I had taken the photos as RAW images (plus/minus
jpg
photos), I would have been able to correct the exposure, and so
would have been
able to keep the image. Taking RAW images is
especially important, if
you're taking photos at a family wedding …
you only have one
chance of getting it right.
RAW image files are huge –
about 25 MB each with my Canon 5D
Mark II camera, so you'll need to use 8-16 GB camera memory cards
As I've said earlier, you get
what you pay for with memory cards, so
if you're covering a
fast-action event, you'll need top quality memory
cards with a high
writing speed … e.g. the top of the Sandisk range.
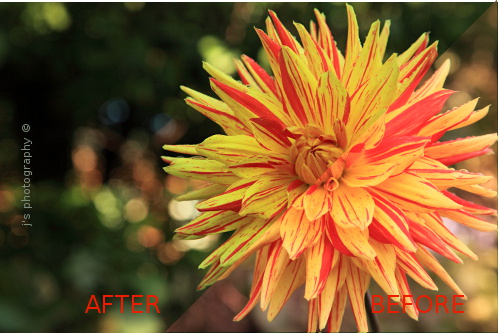
The
following image is a composite image of “before & after” …
before
& after I tweaked it, using DPS. I deliberately over-exposed and
reddened the dahlia image, while I was taking it, for demonstration
purposes. Then I opened up the
RAW image in DPS, and tweaked
both the exposure compensation (brightness) and the white balance
(which is the colour temperature of the image)..
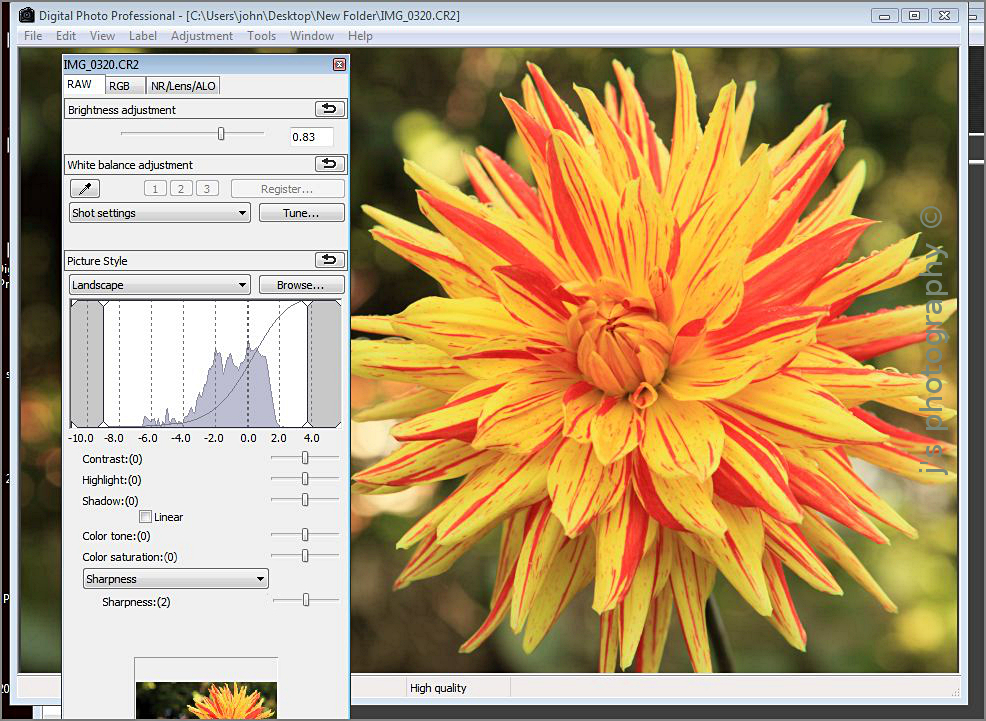
I
thought you might like to have a look at a few screen-shots of how
this
software works. After opening up the software and then opening up the
folder of photo(s), you will then see the RAW image
and the jpeg image
of the same photo (that is, if you'd set your camera up to take both
image types)...
You
then click on the RAW image to open it up, and then press Ctrl + T,
to open up the toolbox …

click on image to see a larger version |
You can then adjust the brightness (the exposure compensation)
by moving the
slider, and you could also increase the sharpness
of the image up to a value of 10. The default value for sharpness
is 2.
click on image to see a larger version |
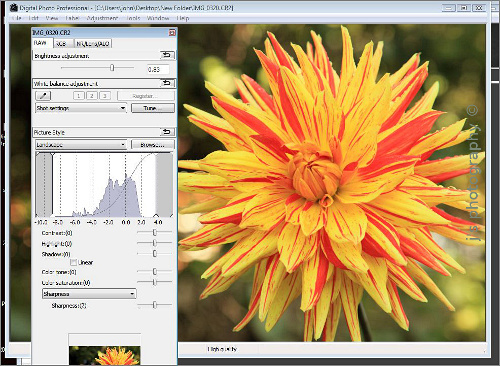
You
can also change the white balance (colour temperature) of the
image,
using the (fine) Tune … you
click on the dead centre of the
circle and move it about, until you reach the colour (temperature) you
want..
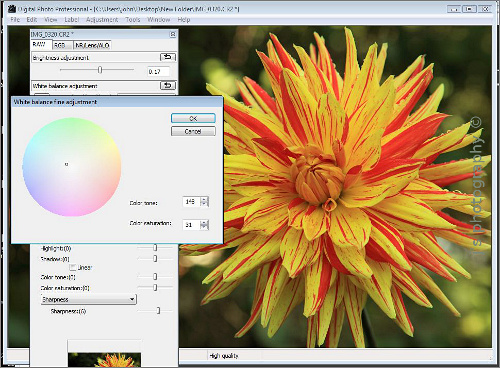
The circular adjustment area for fine tuning the white balance
... click on the image to see a larger version |
You could delete the toolbox now, and
then press Ctrl + D, to convert
the RAW image to a jpeg one, and to save
it.
You
have to remember to change the title of the jpeg image slightly
(I
add a letter “a”), to avoid going
over the old jpeg image, unless
you wish to. This will now be saved
in your image folder (or somewhere
else of your choice).

Options menu for saving the image
Here's my last image to show you ...
| 
Edited image saved with a slightly different name |
I've found an excellent YouTube video with a lot more helpful info about
how to use this software ...
https://www.youtube.com/watch?v=Pcl5nHRARuc

 | Back to Gimp page 3 |
© John Hollins 2009
Page updated
on 07/03/13 |